|
Fender LSR roller nut installation
Consider installing a Fender LSR roller nut, if you're a heavy whammy bar user, or just don't like the looks of the string tees on the headstock. This installation isn't just restricted to Fender guitars, it can be adapted to any guitar with with an inch and eleven sixteenths nut width, or close. The beauty of the roller nut design is its simplicity. Each string is suspended atop two ball bearings. The ball bearings don't necessarily move, rather they provide a small, slick, contact patch for the string to slide over. 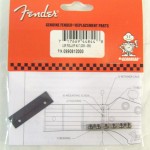
What I'm going to attempt to do here is show you the easiest way to install one of these. Meaning I'm going to use some real basic tools, and methods, to install the roller nut. I'm sure there are folks with all kinds of fancy tools, who could do the job faster, and easier. But that defeats the purpose, you don't want to spend more on tools than the roller nut itself, which by the way, can be found all over ebay for around forty bucks. 
The picture on the right shows the tools you'll need to perform this installation. Many of these you probably already have. Note the file, I purchased this at Walmart for Seven Bucks. You don’t need a cordless Milwaukee hammer drill either, any drill will do with a 1/16" bit. OK, First things first, remove the strings from the headstock of your guitar. The next step is up to you, I removed the neck from the guitar body, but if you’re not comfortable doing that, simply wrap the body with a clean towel and tape up. Using a utility Knife and a sharp blade, carefully score all the way around the nut. This ensures that you won’t take any wood with you when you remove the nut. 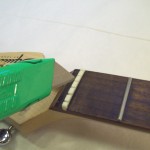
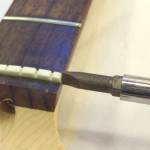
Get your screw driver and a small tack hammer. Place the screwdriver against the nut and give it a gentle strike. It’s advisable to have someone hold the headstock while doing this. If no one’s around place the headstock up against a wall with a clean towel, clamp it, or just do what I do, wing it and hit the thing. The nut is held into place with a very small amount of glue. It will come out easily. 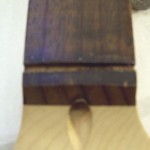
All right, this is what you have left with the nut gone. Wild huh ?, now you know how Lance Armstrong feels. As a foot note this nut removal process is pretty much the same on any guitar with a bone/plastic nut. Take the directions out of the package along with the roller nut. Be careful not to lose the two small screws. The additional piece is not used unless your replacing a Wilkinson nut that was installed on some older Strats. With a small machinists ruler, which I neglected to show in the picture, measure the nut slot depth. Per the instructions, on each edge of the fretboard, you want to be .105 inches down. If you’re shallow file out the pocket, if you’re deep there are small shims included with the kit. 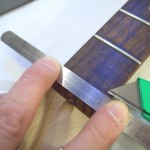
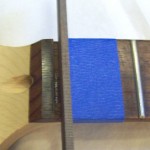
Lay the roller nut in the existing pocket, and mark each end of the roller nut toward the guitar body. We need to remove .094" of material toward the guitar body to get the nut to fit. Once you’ve marked each side of the fretboard, lay your machinists ruler between the two marks and gently score with a knife. This step is probably not necessary but it isn’t a horrible idea. Once the fretboard is scored, tape to the score line with a double helping of masking tape. Tape to the center of the score line to be conservative. 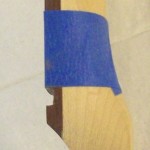
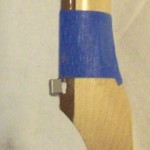
Once you get down to the proper depth make sure you're still strait down. You can see in the picture to the left that I had to file towards the body a little. It’s not a bad idea to try the nut in the groove. A snug fit is really the most desirable. Once you get the nut to snugly seat all the way to the bottom, it’s time to drill the holes. Remember to tape the bit so that you don’t go too deep.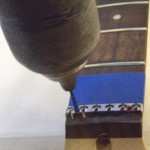
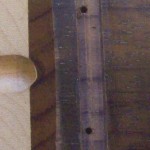
With the holes drilled remove the roller nut, blow away the saw dust, and give the edges of the nut pocket a really light sand with some 220 grit paper. Your pocket should look something like this. Now insert the nut and carefully install the two screws provided with the kit. I’d suggest a little bees wax or soap on the threads. 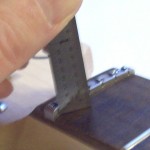
With the roller nut seated tightly measure for proper reveal, and your done. As a footnote here’s a few things you should do once the nut is installed. Once you’ve re stringed the guitar check that the intonation is still right. You may also remove the string tees, and fill the string tee holes. If you do remove the tees, and don’t have locking tuners, make sure you add a few extra turns of wire to the tuner posts. Good Luck J. Brennan
Return from Fender LSR roller nut to Electric Guitar Info home |


