|
Changing an electric guitar neck
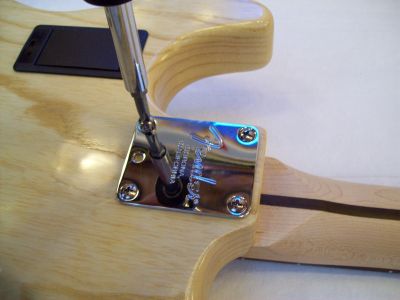
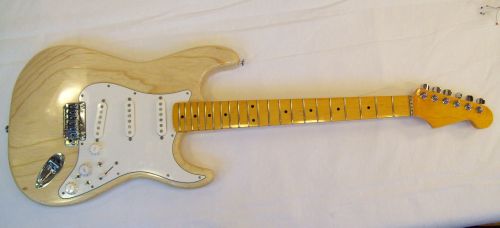
You may find yourself in need or want of changing your electric guitar neck. Your frets may be worn, and you don't want to spend the time re-fretting. The fret surface may be worn from extended play. You may want to change over to a compound radius neck. Whatever the reason, if you own an electric guitar, with a bolt on neck, changing it out is a pretty easy process. In this example I'm going to swap the guitar neck on my custom natural ash bodied strat. I'm doing this for two reasons. I've got some electronics under the pickguard that I need to get at every once and a while, and I really wanted a 12" diameter, maple neck on this guitar. To start with remove the neck screws, and neck plate.
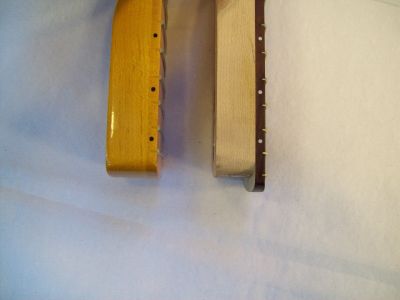
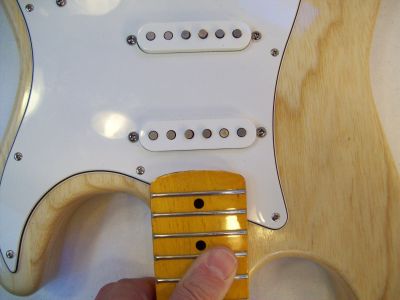
The neck I'm going to install is a 21 fret neck. As I mentioned above I need to get at the electronics under the pickguard, and with the 22 fret neck that was on this guitar, I had to remove the neck in order to remove the pickguard. Note the photo below showing the difference between a 21 and 22 fret neck. The 22 fret neck extends out over the pickguard.
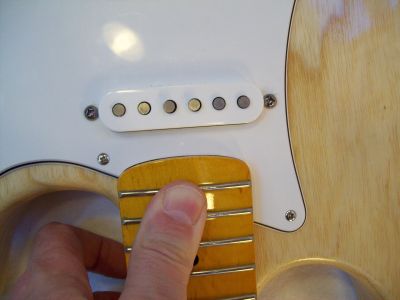
With the original neck removed the first thing to check is the fit of the new neck into the body.
This particular guitar neck was a little wider than the neck pocket on the body. This is an important cross road depending on your skill level, and what you're comfortable doing. I'm not afraid to try anything, whether I know how to do something or not. But screwing up your guitar body may be something you're not willing to risk.
If your willing to take the risk then lets move on. Carefully measure the neck and the neck pocket and determine how much material you must remove. As a footnote never try and force the neck into the pocket, you will break an edge off of the pocket. Using a dremel tool with a fine sanding drum carefully remove an even amount of material from the low side of the neck pocket. Try installing the neck often through out this process. You want a nice snug fit, but you certainly don't want to remove too much material
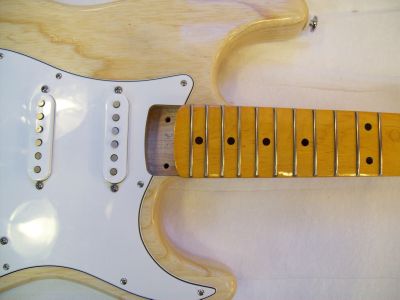
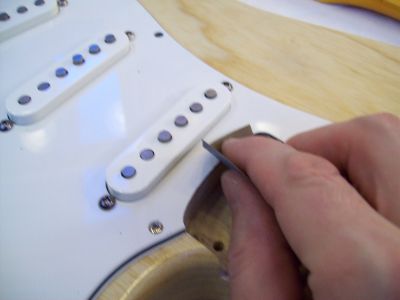
Now if you are installing a 22 fret neck, and you get it to fit snugly, as in the photo above, you're ready to drill some holes and install the neck. Move down to the clamped neck photo, and follow the drilling instructions. If you're installing a 21 fret neck, as I did, you'll need these next few steps. One of the nice things about a 22 fret neck is that it overhangs the pickguard. This in turn covers the fact that the pickguard does not match up to the neck radius exactly. So if installing a 21 fret neck, you'll need to grind some of the pickguard to match perfectly.
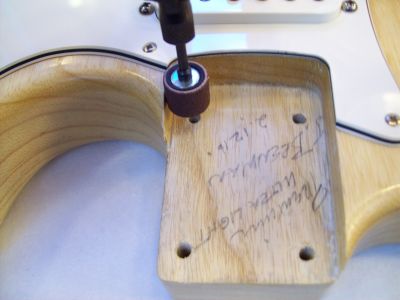
In the photo above notice that I'm grinding at an angle. Having a sharp edge will help the neck fit more snugly. It also makes hand sanding the edge of the pickguard easier. Once you get the pickguard ground close to fit with the dremel tool, use some 400 grit sandpaper to make the edge perfect.
It is imperative when grinding, and sanding, that you take your time. You can't check the fit of the neck in the pocket often enough
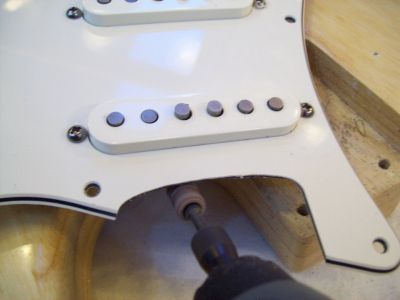
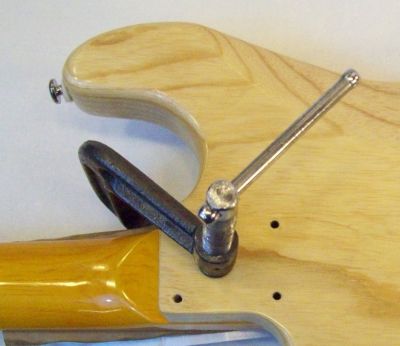
Once you have the guitar neck fitted perfectly to the neck pocket, it's time to drill some holes. Use a "C" clamp or similar to hold the neck to the body. Put some cardboard between the clamp, and the fret side of the neck for protection. You don't have to clamp down hard, just so the neck is snug. I used a 7/64" drill bit for this installation, but screw sizes can vary between guitars. Your best bet is to use a sample block of wood and drill some test holes for best screw fit.
Place a piece of tape on your drill bit to set the depth. Drill as many holes as you can with the clamp in place. Reposition the clamp to drill the final hole(s). Remove the guitar neck and blow out all saw dust. Put the neck back into the neck pocket and fasten it to the body using the neck plate and screws. Put some bees wax, or soap, on the screws before installing. Remember to tighten all screw down in a cross hatch pattern. Don't tighten one screw all the way in then move to the next, you want a nice even tightening.
Once the neck is in restring the guitar, and your almost there. Check and adjust the action if necessary, then check and adjust intonation. I'll have a tutorial on guitar setup coming soon.
return from install a guitar neck to Electric Guitar Info home |