


|
Lexan Guitar Amp Enclosure
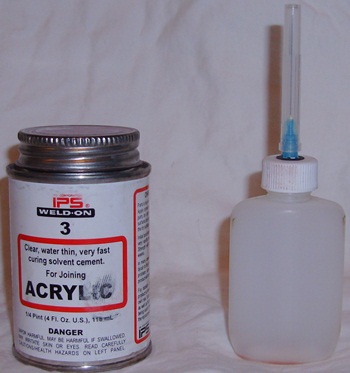
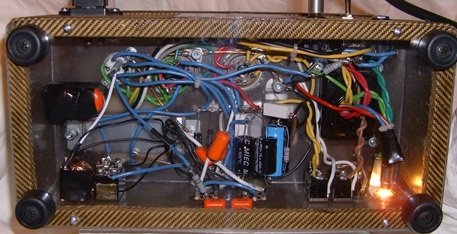
I built my first guitar amp enclosure out of lexan, and have fallen in love with the material since. Lexan is easy to work with, doesn't chip, drills and sands easily, and for small cabinets is inexpensive. If you choose to build a cabinet out of Lexan, here are the minimum tools you should have, a skill saw with a good carbide blade, 24 teeth or more. A belt sander, although some 80 grit paper on a flat surface will work , a framing square, or speed square, a strait edge, two C-clamps, a work table of some sort, eye protection, tape measure, small sharpie, hand drill, assorted bits, jig saw with sharp metal blade, and hole saws for tube sockets. A small table saw is preferable over a skill saw, and an upright belt sander is nice to have as well, but not needed. The Lexan I use is 1/4", and can be purchased through a local glass supplier. I have bought Lexan on ebay at reasonable prices, and in sizes that work for the particular guitar amp enclosure I'm building. Along with the lexan sheet you will also need a small can of Weld-on #3, and a needle bottle, both shown above. Lexan does come in Bronze and Black, I have not used either but plan to in the future. Once you have the size enclosure mapped, I would write down the size of each piece needed on a sheet of paper, keeping track of the thickness of the Lexan for interior/exterior pieces. When ready to cut lay the lexan out, clamp the straightedge accounting for the width of the saw, and begin cutting. When using a skill saw I always try the strait edge on a scrap piece of plywood, to get the exact offset measurement. Set the depth of the saw for a 1/2" or so. Make sure you start the saw with the blade NOT touching the Lexan, let it get up to speed, and begin cutting. Once all of the pieces are cut, map out the piece where you are going to mount the tube sockets and transformers in the guitar amp enclosure. Drill and cut what you need. Once this is done sand the saw marks off the edges with a belt sander, or lay a piece of 80 grit paper on a flat surface, and slide the edge over the paper. With all the pieces cut and sanded it's time for assembly. Place a small amount of Weld-On in the needle bottle. I use a non medical syringe to do this. Now here's the beauty of lexan, take two pieces that are going to be together at 90 degrees. Lay one piece flat, with the other standing up on edge at the corner of the flat piece. Have a square handy. Take the needle bottle and just run a small bead where the two pieces meet. The solvent will travel underneath the two pieces like magic. Be careful not to drip on the Lexan for it will melt and leave a mark. Hold for a minute or so making sure the edges are flush at the outside corner. Use the square after a few minutes to make sure the pieces are at 90 degrees. Repeat until the enclosure is assembled. No clamps, nails, screws or messy wood glue needed. I would highly recommend practice on some scrap pieces first. Once the glue sits for ten minutes of so you can handle the enclosure. After 24 hours the guitar amp enclosure will be as solid as a rock. If you plan on covering with tolex you certainly don't need to be as careful with the solvent. I have not had success in making a clear enclosure without some drip marks. But I believe I'm good enough to make a bronze enclosure. Keep in mind Lexan is a brand name, and I prefer actual Lexan. Polycarbonate Sheet is the same thing, but I've found some quality issues with generic stock. DO NOT use Acrylic or Plexiglass, it is not the same. I realize the Weld-On says Acrylic, it works fine on Lexan. I will be adding a page soon on how to apply tweed, tolex, and an accidental surprise, scrap leather to a guitar amp enclosure. Below is the bottom of the tweed amp I just built, with a clear Lexan cover showing off the circuitry. Good luck, and as always your questions are welcome. J.B. 3-10-11
return from Guitar Amp Enclosure to Electric Guitar Info home |
If you have any questions regarding electric guitar modifications, building, setup, amplifiers, etc. send me an email .....Guitarinfo145@aol.com..... All questions are appreciated, and often lead to new ideas for additional content. I do my best to get back as soon as possible, Thanks, J.B.